
Setup & Installation
Uploading Files
Once you have downloaded your file from the Envato Marketplace, you will need to extract the files from the ZIP file. You will need to upload the product core files to a webserver. First locate the core files in the folder: core_files/core.zip. You will need to extract the files from the zip and upload them so that these files are in your main directory on your webserver, usually this is the public_html folder. If you wish to upload them to a sub-folder, this is fine too- just make sure you read the footnotes about installing in a sub-folder.
Your webserver's main directory should look something like this:

Config Settings
Before you can use your product, you will need to edit the config files. First locate the config file in: application/config/config.php and open it up using a text editor such as notepad. The only line you should need to edit is the:
$config['base_url'] = 'http://www.example.com/';
Replace the http://www.example.com with your own domain name, making sure you keep the quotation tags around it as above. There are some other settings that you can also edit in this file if you feel the need to customise your product further but for a basic installation this is all you should need to edit. Save the file and overwrite the existing one on your webserver.
Database Settings
The second file you will need to edit is your database file. Find the file: application/config/database.php and open it up using a text editor like Notepad. You will need to edit the lines listed below with your own database login information. For the most part, host stays the same as localhost unless your web host specifies to you otherwise. You will need your database name, database username and database password.
$db['default']['hostname'] = 'localhost';
$db['default']['username'] = 'your_username';
$db['default']['password'] = 'your_password';
$db['default']['database'] = 'database_name';
Once you have modified this file, save it and overwrite the existing one on your webserver.
Next you will need to execute the SQL file that came with the product download. This file will create the database tables that are used to store the data of your application. Usually you can import the SQL tables by using a database management system like PHPmyAdmin. The SQL file is located in core_files/database.sql in the product download.
To Import the file, login to your database management system, such as PHPmyAdmin. Make sure you are on the database that you named in the database.php config file then locate the Import Tab on PHPmyAdmin.
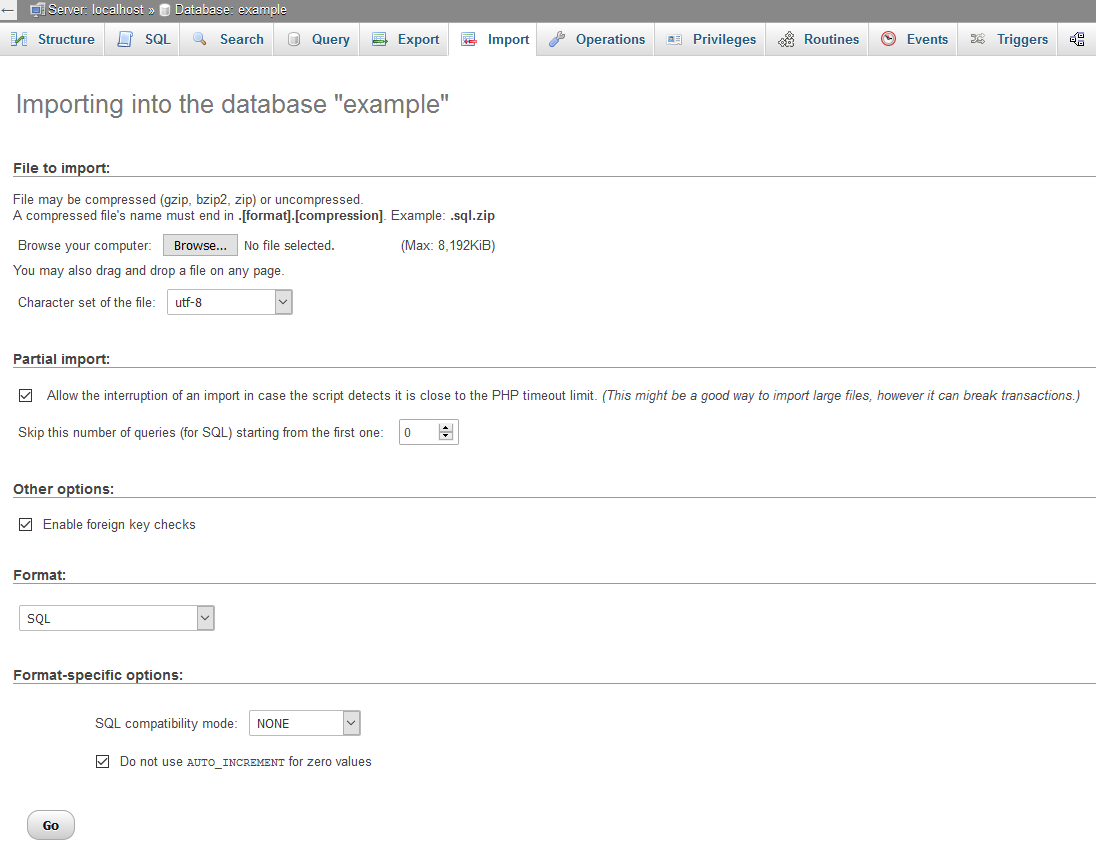
Next select the browse button (as shown in the screenshot above) and locate the SQL file (core_files/database.sql) from your product download file. Next click the Go! button and you should now see database tables appear in the left sidebar.
Mod Rewrite
We use a URL routing trick called mod_rewrite. This is normally installed by default on most web servers and allows for URLS like: http://www.example.com/some/file/here/ instead of http://www.example.com/myfile.php.
If you don't have mod_rewrite settings enabled on your web server, you can still use the application by setting your index_page value to the following line in the application/config/config.php file:
$config['index_page'] = 'index.php';
This setting will make it so your URLs have index.php in them. However, the default setting is to remove this and assumes you have mod_rewrite enabled on your webserver.
Creating the Admin Account and Setup Site
Finally, you will need to run the install file in your web browser. A notification will pop-up on the site once you have filled out all the database settings and config settings linking you to the install file. Or you can locate it by going to http://www.example.com/install/ where example.com is replaced by your own. Here you'll be able to create the Admin account with full access to the site as well as some initial site settings.
If you're having problems accessing this URL, double-check that you entered the correct information in the application/config/config.php file. If you are sure that it is correct, it may be something to do with your webserver's settings with allowing mod_rewrite. The problem most notably is usually with the .htaccess file in the main directory- make sure this file is in your main directory (like in the directory screenshot above). If you still have problems, check out our Knowlege Base or feel free to contact us.
If you added index.php to your config setting index_page in the application/config/config.php file, the URL to install will be: http://www.mydomain.com/index.php/install/.
IMPORTANT: Once you have installed the product, please delete the file application/controllers/install.php! This will prevent other users from messing up your settings.
Installing In A Sub-Folder
If you're installing the software in a sub-folder, such as http://www.example.com/my_subfolder/ then you will need to modify the .htaccess file inside the main directory (the one that holds the application, bootstrap folders etc). All you need to do is open up the .htaccess file in your text editor and copy the following code, replacing the sub-folder with the name of your sub-folder (in this example, the sub-folder is called sub_folder_name_here. Replace this with the name of your sub-folder).
RewriteEngine On
RewriteBase /sub_folder_name_here
RewriteCond %{REQUEST_FILENAME} !-f
RewriteCond %{REQUEST_FILENAME} !-d
RewriteRule ^(.*) index.php?/$1
Save the file as .htaccess and overwrite the one inside your main directory that you used to install the software in (the folder containing the application, bootstrap folders etc). You can skip this step if you're installing in your main folder.