
How To Setup Google Calendar
This is a guide on how to setup Google Calendar to work with the Calendar system on TITAN. If you can't setup the Google Calendar, you can alternatively use the Site Calendar option in the Admin Panel, which stores all events on the local database.
Let's begin.
You will need a Google Account in order to enable the Google Calendar API. Make sure you're logged into your Google Account before continuing.
First you need to create a Project in the Google Developers Console. If you haven't done this yet, you can follow this link: https://console.developers.google.com/flows/enableapi?apiid=calendar&authuser=1&pli=1
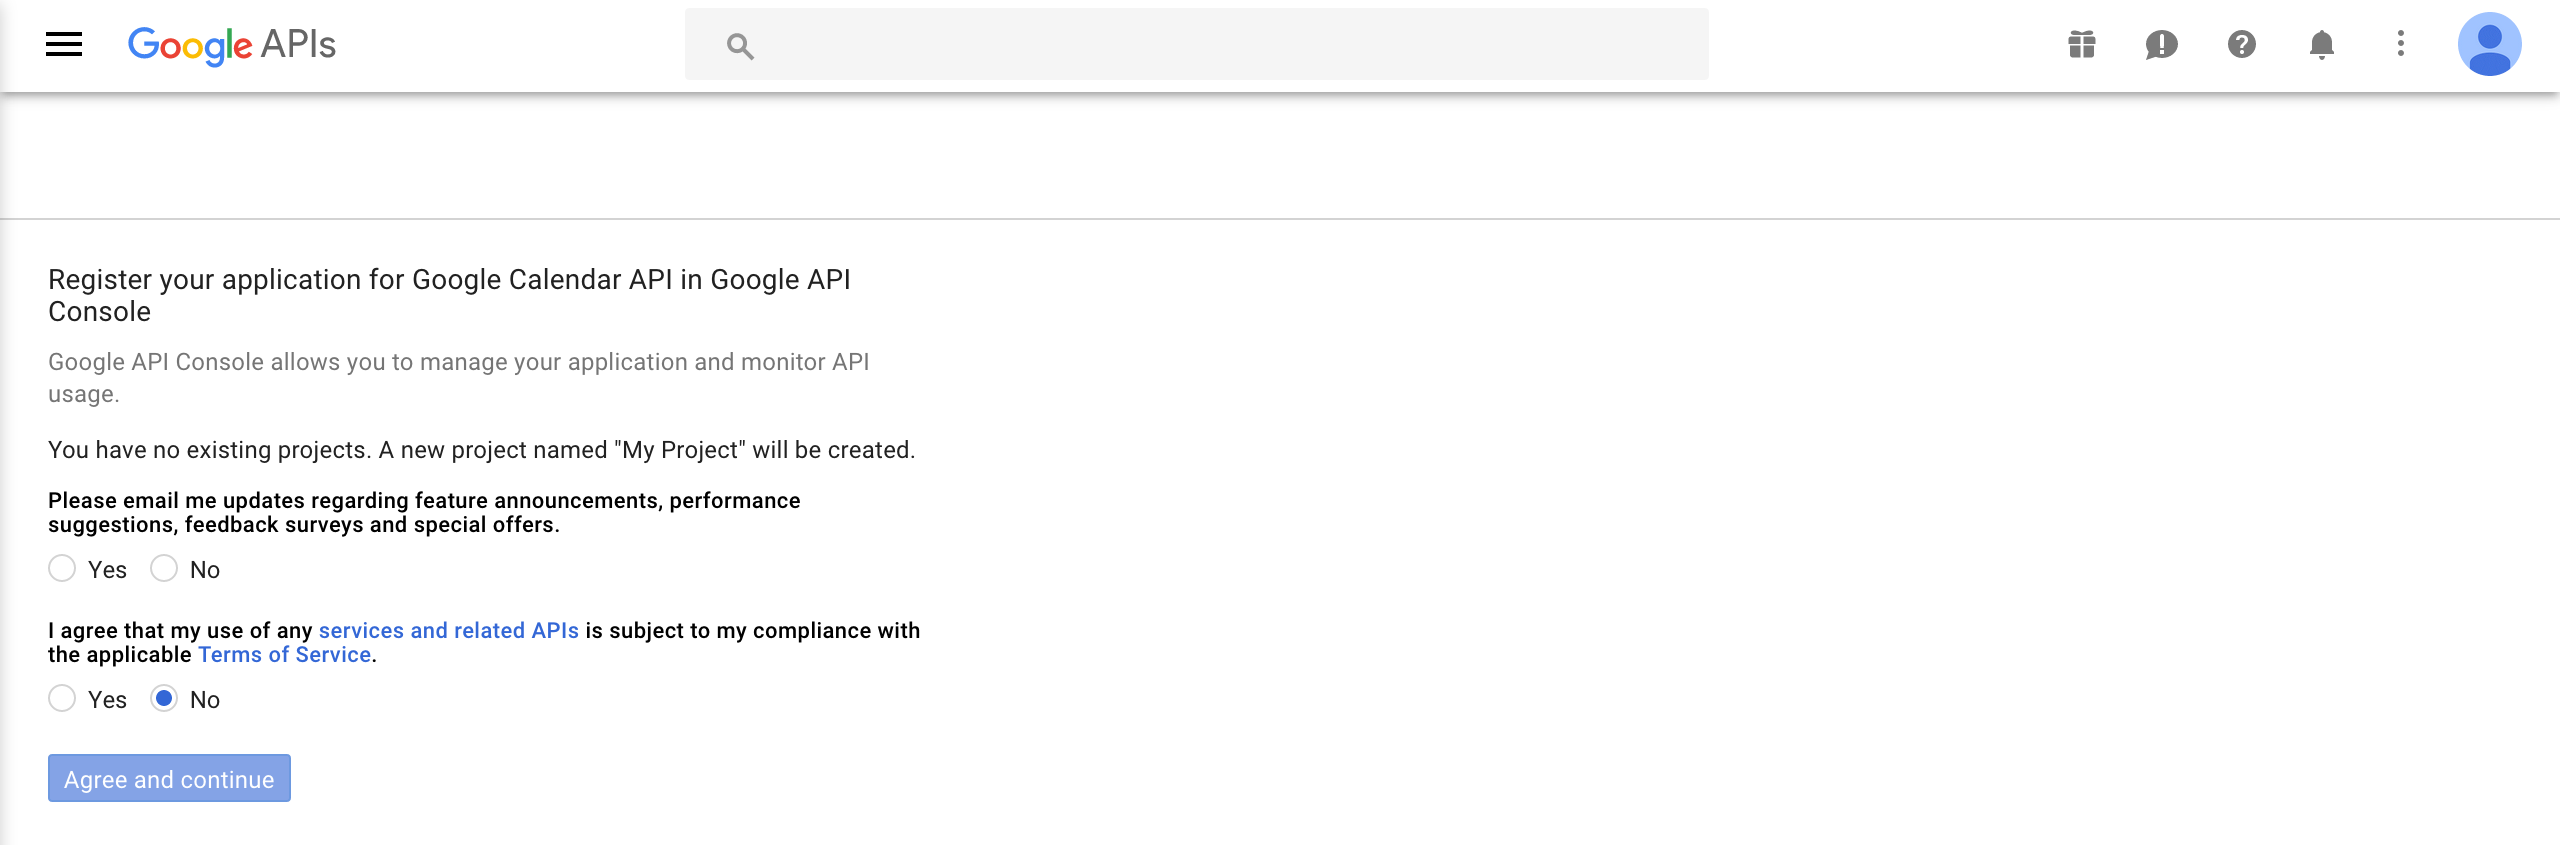
This will create a default project called My Project and also enable the Google Calendar API for you. It will take a couple of minutes to setup.
Once created, you'll be presented with the Credentials page. You want to select the Web Browser (Javascript) option for the first drop down menu and User Data for the second drop down menu.

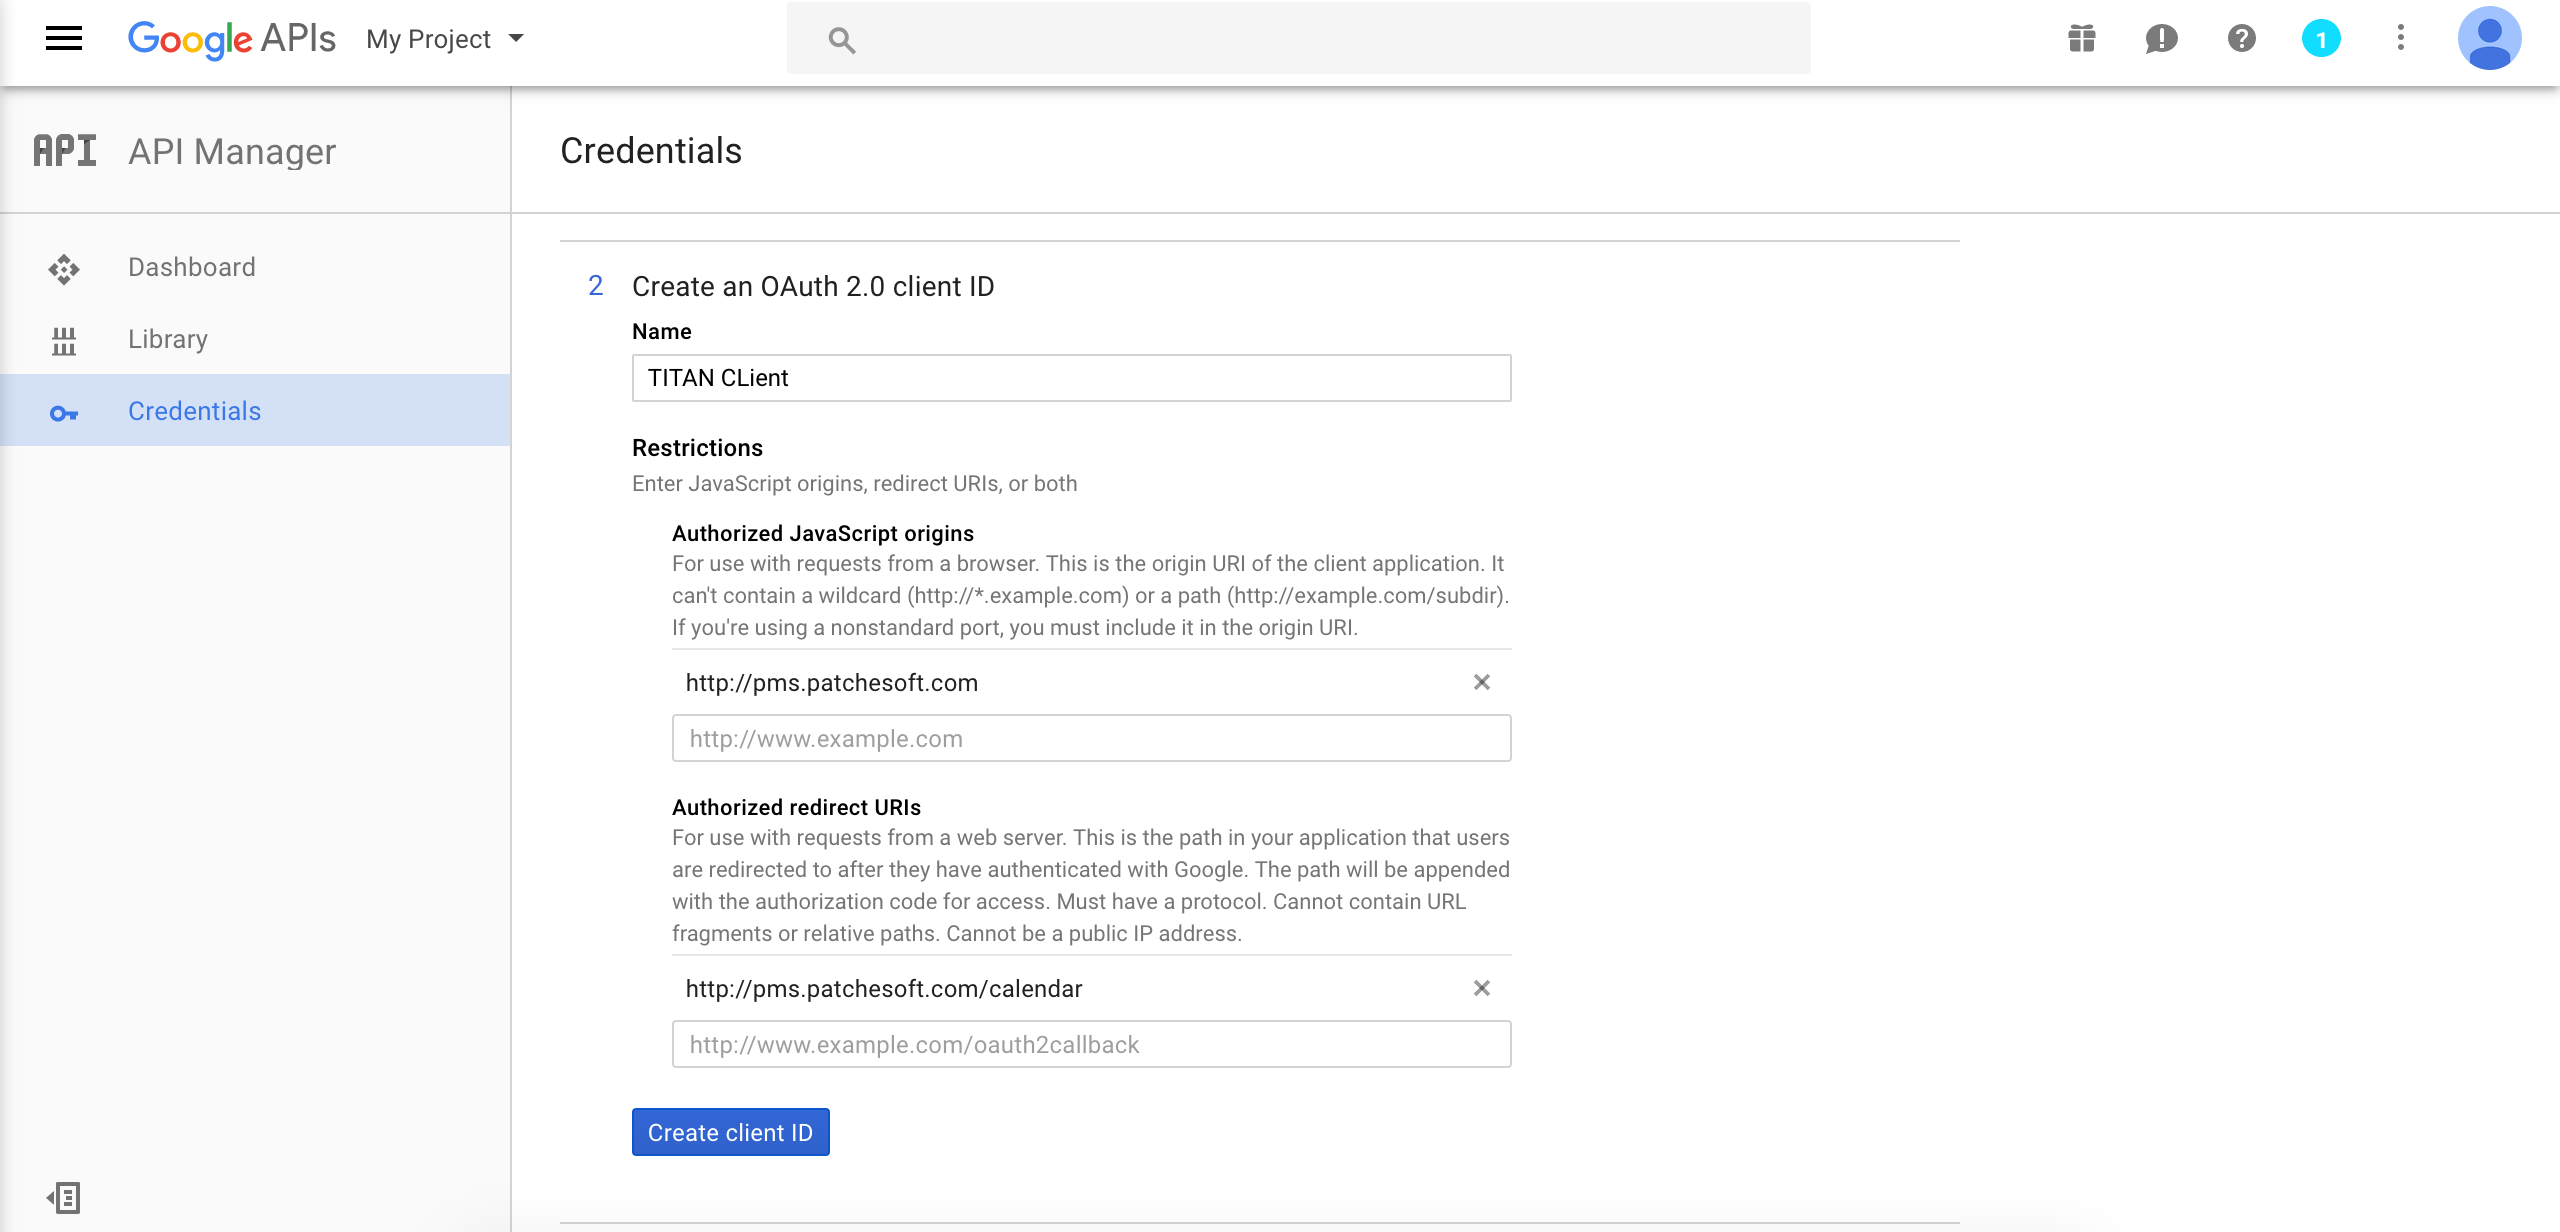
The next step is creating your "Create an OAuth 2.0 client ID". This is so users can authenticate with google and pull the google calendar data. You want to fill out the form like so:
- Name: Name of your application (titan)
- Authorized Javascript Restrictions: Your website's domain that contains Titan. I.e. http://pms.patchesoft.com
- Authorized Redirect URLs: The URL that points to your Calendar: http://pms.patchesoft.com/calendar/
On the next screen you'll finalize the details. Give your application a name and the email address you want to display to users when they get a request to access the Google Calendar. Once complete, you'll be presented with your Google Client ID.

Next you want to create the API Key. To do this, click the Create Credentials button on the Credentials page. From the dropdown menu, select API Key. This is your Google Calendar API Key.
To get your Google Client Secret key, you need to select the OAuth 2.0 Client IDs that you just created and select the Edit Button. At the top of the page should be the Google Client Secret listed.
You now have all the keys needed. There is just one thing left: the Google Calendar ID of the Google Calendar you wish to use.
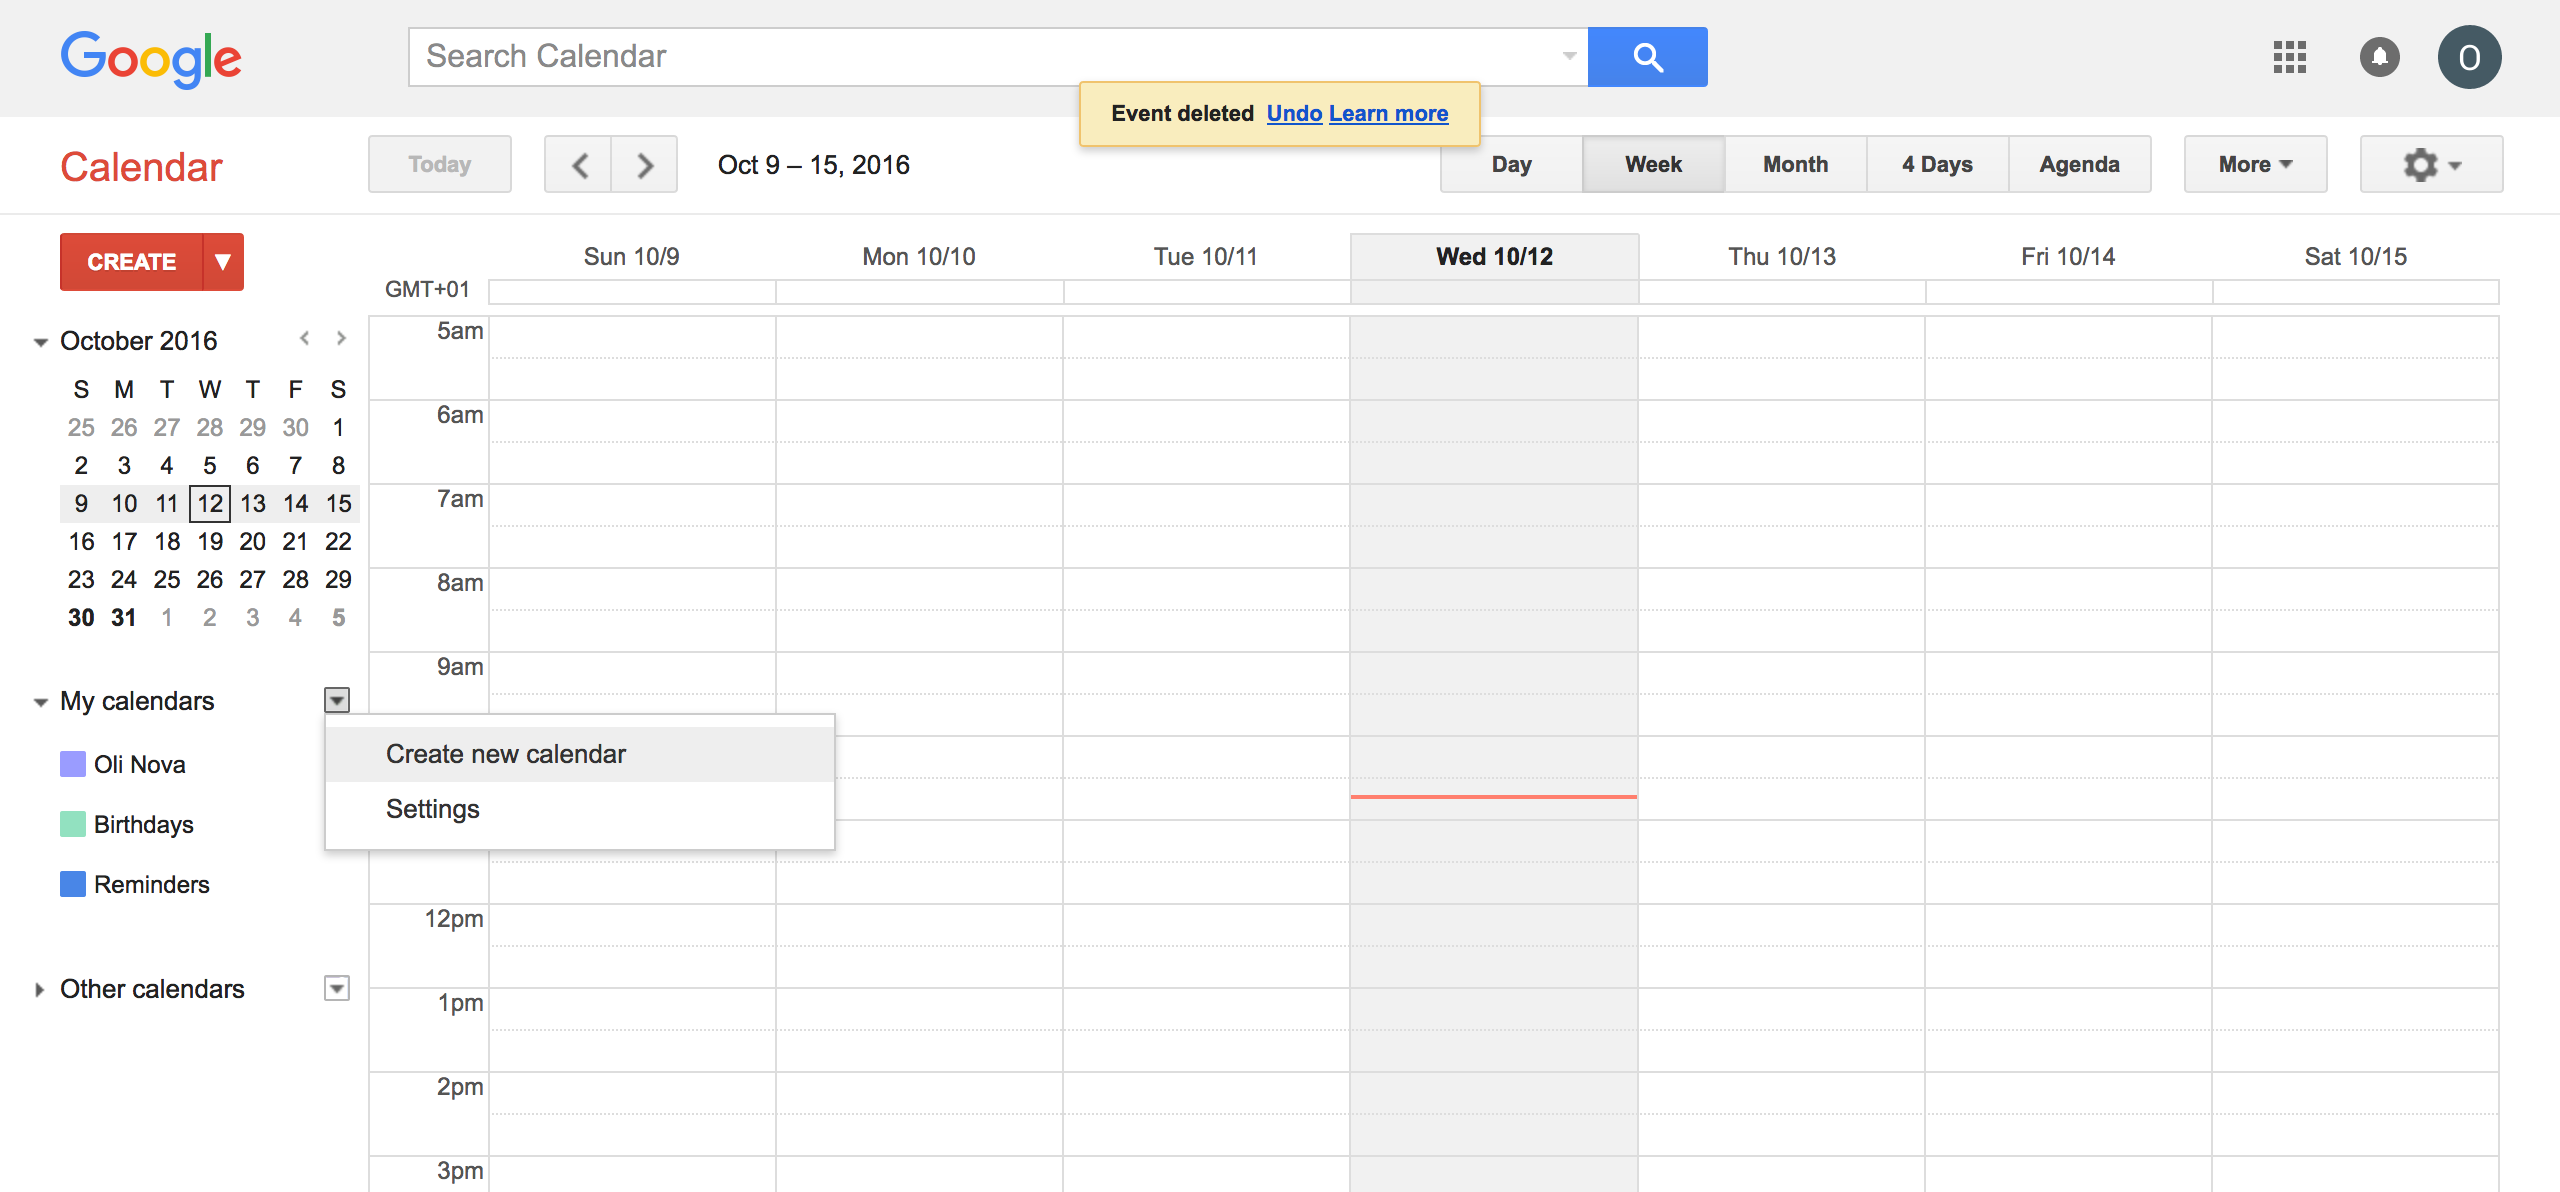
To obtain this, go to your Google Calendars (https://calendar.google.com/) and select the Create New Calendar option by clicking on the My Calendars dropdown menu.
Name your calendar and also make sure to select the Make This Calendar Public sharing setting. If this is not selected, the Google Calendar API won't be able to fetch the calendar data.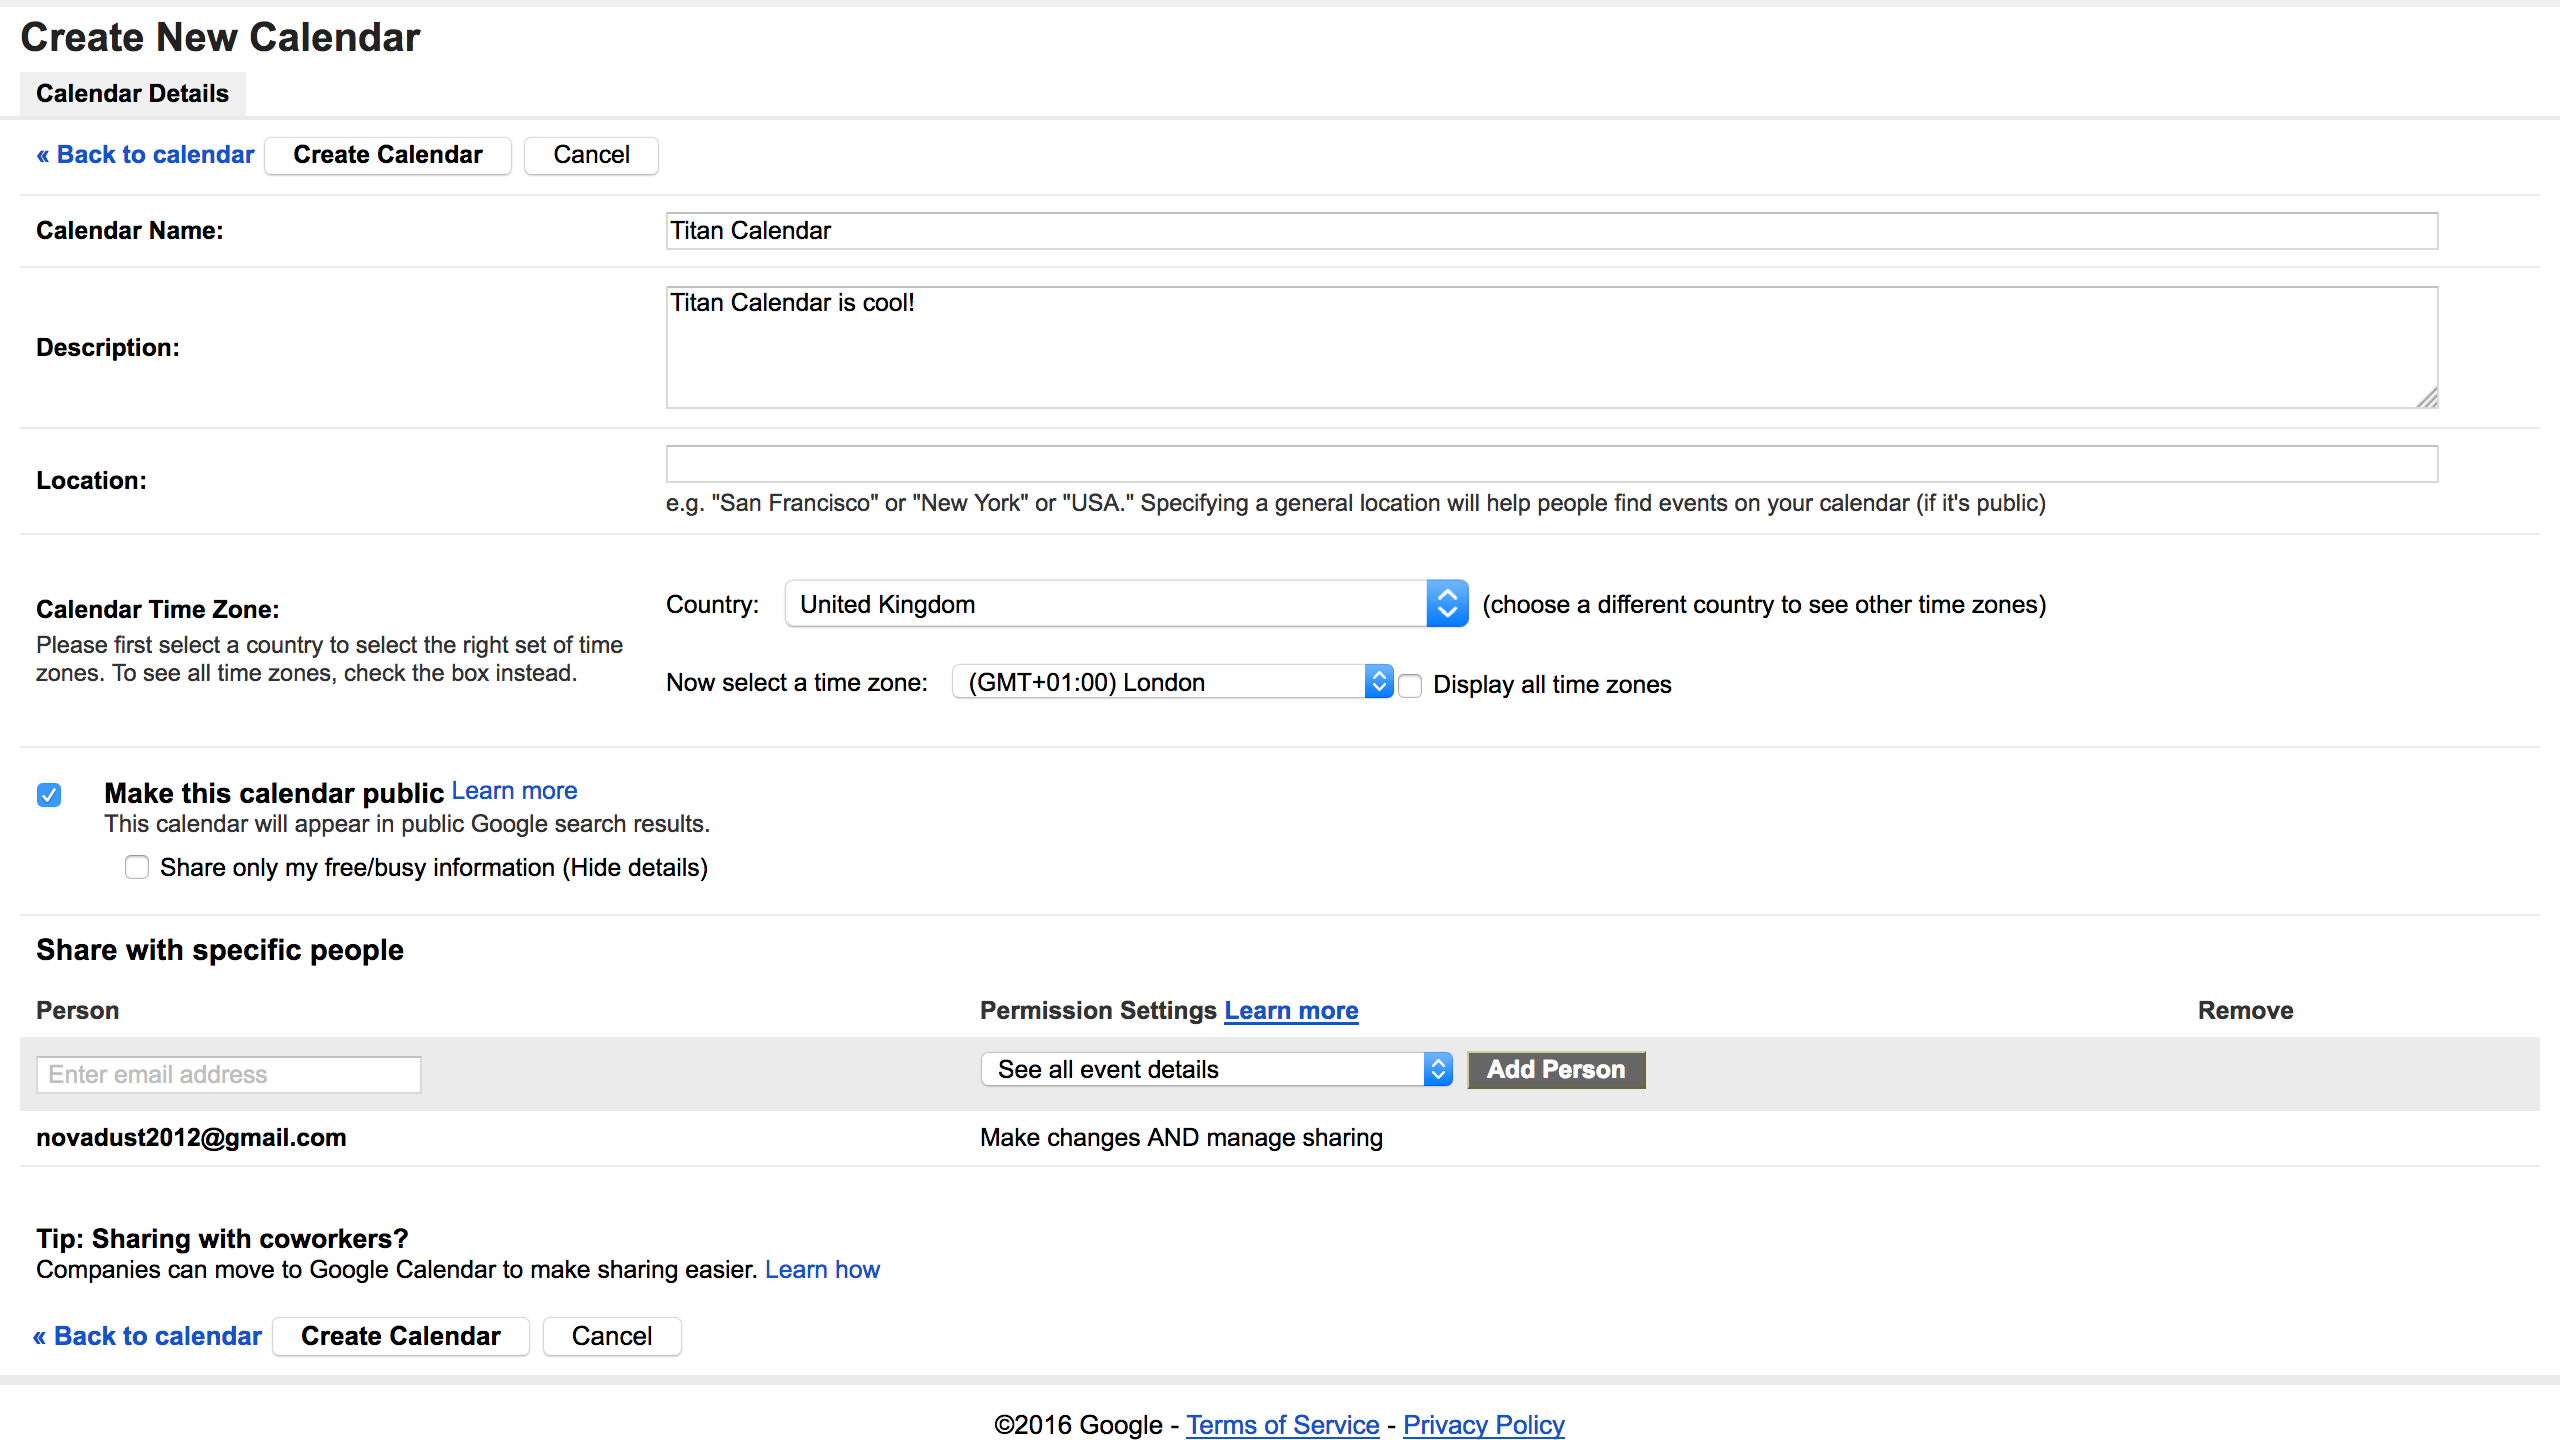
Create your Calendar and then go to Edit Calendar by clicking on the dropdown menu beside the Calendar Name under My Calendars. Select Calendar Settings. On this page, you'll find the Google Calendar ID. It's normally in the form of an email address.
You now have all the details needed to start the Google Calendar. Enter them into your TITAN application via the Admin Panel Calendar Settings page. Make sure you select Google Calendar from the Calendar Type dropdown menu.